Migrating your website from WordPress to Webflow can seem daunting, but it can be a smooth and rewarding process with the right approach and tools. This comprehensive guide will walk you through automatic and manual methods of migrating your previous website to a new Webflow website, drawing from expert sources to ensure you have all the information you need for a successful transition.
Whether you’re a small business owner looking to refresh your online presence, a blogger seeking a more design-centric platform, or a web professional exploring new possibilities, this guide will help you confidently navigate the migration process.
Table of Contents
- Understanding WordPress and Webflow: A Comparison
- Understanding WordPress to Webflow Migration
- Preparing for Migration
- Migrating the Design
- Migrating Content
- Setting Up Webflow CMS
- SEO Considerations
- Testing and Launching
- Post-Launch Monitoring
- Post-Migration Tasks
- Do You Need Help? We Got You!
- Summary
- Frequently Asked Questions
- What are the main advantages of migrating from WordPress to Webflow?
- How can I prepare for the WordPress to Webflow migration?
- What are the options for migrating content from WordPress to Webflow?
- How can I ensure my SEO is preserved during the migration?
- What are some common challenges in WordPress to Webflow migration?
Understanding WordPress and Webflow: A Comparison
Before we get into the nitty-gritty of moving your site from WordPress to Webflow, let’s take a step back and understand what sets these two platforms apart. Comparing the key differences will help you see why switching to Webflow could be a game-changer for your website and ensure you’re prepared for a seamless transition.
WordPress, while popular, has its limitations. One significant drawback is the reliance on predefined layouts in WordPress themes, which can restrict customization options and often require developer assistance for substantial changes. This can be frustrating for users seeking more flexibility in their website design.
On the other hand, a Webflow website offers numerous advantages. Webflow provides better design freedom, superior hosting options, and improved website content management compared to WordPress. This makes it an attractive option for creating a more dynamic and easily manageable site.
WordPress: The Traditional Powerhouse

WordPress has long been the go-to platform for building websites, powering over 40% of the internet. Its massive popularity stems from being open-source, with a vibrant community constantly developing new plugins and features. This ever-growing library of plugins gives WordPress users incredible flexibility to enhance their sites in countless ways.
One of WordPress’s biggest strengths is its user-friendly content management system (CMS). Even non-techies can easily create and manage content without needing to know coding. WordPress is also SEO-friendly out-of-the-box, making it simple to optimize your site for search engines. Choosing the right hosting provider is key here, as it impacts performance, domain management, and DNS records and can facilitate a smooth migration with minimal downtime.
However, WordPress does have its limitations. While it’s easy to get started, advanced customization often requires knowing coding languages like PHP and CSS. Its popularity also makes it a frequent target for hackers, so regular security updates are necessary. Performance can suffer with poorly optimized themes and too many plugins slowing down load times. Additionally, WordPress exports data in XML format by default, which can be cumbersome to work with during migrations.
Webflow: The Modern Web Design Platform
Webflow is a fresh face in web design, offering a visual approach that’s turning heads. Its standout feature? A visual design interface that empowers designers to build websites without extensive coding know-how, bridging the gap between design and development like never before. Starting a new Webflow project allows designers to leverage these tools from the ground up, ensuring a cohesive and efficient design process.
But that’s not all – Webflow generates clean, efficient code that keeps things lean and mean. Unlike WordPress, which can produce bloated code from many plugins, Webflow creates optimized HTML, CSS, and JavaScript, resulting in lightning-fast load times that will keep visitors happy.
And let’s not forget Webflow’s powerful integrated CMS, which can easily handle even the most complex content structures. That said, there is a bit of a learning curve for those used to traditional CMS platforms, and the plugin ecosystem is more limited. Plus, advanced features and hosting can come with a heftier price tag.
Understanding WordPress to Webflow Migration
When considering a move from WordPress to Webflow, it’s crucial to understand the fundamental differences between these two platforms. WordPress, a widely used content management system (CMS), has been a go-to choice for many website owners due to its flexibility and extensive plugin ecosystem. It relies heavily on themes and plugins for functionality and design, sometimes leading to bloated code and potential conflicts between 33 different components.
On the other hand, Webflow is a more modern approach to web design and development. It’s a visual web design tool that combines design, content management, and hosting into one cohesive platform. This integrated approach eliminates the need for separate plugins and themes, potentially leading to a more streamlined and efficient website. Initiating a new Webflow project is the first step in this migration process, setting the stage for a smooth transition.
The reasons for migrating from WordPress to Webflow can vary, but some of the most common motivations include:
- More intuitive design interface: Webflow’s visual editor allows for real-time design changes, making it easier for designers to bring their visions to life without extensive coding knowledge.
- Greater control over the look and feel: With Webflow, you have pixel-perfect control over your design elements, allowing for more unique and customized layouts.
- Built-in hosting and security features: Webflow offers robust hosting solutions and handles security updates, reducing the maintenance burden on website owners.
- Clean code output: Webflow generates clean, efficient code, leading to faster loading times and improved overall performance.
- Improved SEO performance potential: The clean code and performance improvements can contribute to better search engine rankings.
- Responsive design made easier: Webflow’s responsive design tools simplify creating websites that look great on all devices.
The migration process from WordPress to Webflow involves several key steps:
- Recreating your website’s design in Webflow’s visual editor: This involves rebuilding your site’s layout, styling, and interactive elements using Webflow’s tools.
- Transferring your content, including pages, blog posts, and media files: This step requires careful planning to ensure all your content is accurately moved to the new platform.
- Setting up Webflow’s CMS to manage your dynamic content: This involves creating collections and templates to handle your blog posts, portfolio items, or any other repeatable content types.
- Ensuring all functionality is preserved: Any features you had in WordPress need to be recreated, or alternatives for Webflow need to be found.
While this process can be complex, especially for larger sites with extensive content and custom functionality, it offers an opportunity to refine and improve your website’s structure and design. Many website owners find that migration allows them to reevaluate their content strategy and user experience, often resulting in a more effective and user-friendly website.
Preparing for Migration
Before diving into the migration process, thorough preparation is essential. This preparatory phase can distinguish between a smooth transition and a frustrating, problem-filled migration. Let’s break down the key steps in more detail.
Assessing Your Current WordPress Site
Start by conducting a comprehensive audit of your current WordPress site. This involves taking inventory of all your content and functionality. Here’s what you should catalog:
- Pages: List all your static pages, including their URLs and any special layouts or features they might have.
- Posts: Document all your blog posts, including categories, tags, and any custom fields you might use.
- Media files: List all images, videos, PDFs, and other media files used throughout your site.
- Plugins: Note all the plugins you use and their functionality. This will help you determine what features you need to recreate in Webflow.
- Custom post types: If you’re using any custom post types, document their structure and how they’re used on your site.
- Widgets: Make note of any widgets you’re using in your sidebars or footers.
- Forms: List all the forms on your site, including contact forms, newsletter signups, or any other data collection points.
- Integrations: Document third-party integrations, such as social media feeds, analytics tools, or marketing platforms.
This thorough assessment will help you understand the full scope of your migration and identify any potential challenges or complexities you might face.
Planning Your New Webflow Site Structure
With a clear understanding of your current site, you can now plan how to structure your new Webflow site. This is an excellent opportunity to reevaluate your site’s organization and user flow. This planning phase is crucial for ensuring your new website is well-organized and user-friendly.
Consider the following:
- Information Architecture: Sketch a sitemap showing how your pages will be organized. Consider whether your current structure is optimal or if it could be improved.
- Content Hierarchy: Consider how your content will be organized within Webflow’s CMS collections. This might involve creating new categories or tags to manage your content better.
- URL Structure: Plan your URL structure in Webflow. While you’ll want to maintain important URLs for SEO purposes, this could be a chance to improve some URL structures for better clarity and SEO.
- User Journey: Consider the typical paths users take through your site. Are there ways you can improve this flow in your new Webflow design?
- Performance Optimization: Consider elements of your current site that might slow it down. How can you address these in your Webflow implementation?
Creating a Comprehensive Backup
Before making any changes, creating a complete backup of your WordPress site is crucial. This backup should include:
- Your database: This contains all your posts, pages, comments, and settings.
- All files: This includes your theme files, plugins, and any custom code you might have.
- Media content: All images, videos, and other media files uploaded to your site.
You can use WordPress plugins like UpdraftPlus or BackupBuddy to create this backup. Alternatively, you can manually export your database through phpMyAdmin and download your files via FTP. Keeping a local copy of your entire WordPress installation is also a good idea.
A comprehensive backup ensures you can revert to your original site and provides a safety net throughout the migration process. It’s not just about having a fallback option; this backup will also serve as a reference point as you rebuild your site in Webflow.
Migrating the Design
Recreating your WordPress design in Webflow is a hands-on process that requires careful attention to detail. While it might seem daunting initially, this process often leads to improvements in your site’s design and functionality. Let’s break down this process into more manageable steps.
Analyzing Your Current WordPress Layout
Before you start building in Webflow, take time to analyze your current WordPress layout thoroughly. Pay attention to:
- Header structure: Note the arrangement of your logo, navigation menu, and any other elements in your header.
- Footer design: Document the layout of your footer, including any widgets, menus, or copyright information.
- Navigation menus: Analyze how your menus are structured and how they behave on different screen sizes.
- Content sections: Look at how your content is laid out on different types of pages (homepage, blog posts, static pages, etc.).
- Sidebar elements: If you use sidebars, note what elements they contain and on which pages they appear.
- Typography: Document your font choices, sizes, and styles for different elements (headings, body text, links, etc.).
- Color scheme: Note your color palette, including primary, secondary, and accent colors.
Take screenshots and measurements where necessary. This detailed analysis will serve as your blueprint when rebuilding in Webflow.
Rebuilding in Webflow’s Designer
Now that you understand your current design, you can start rebuilding in Webflow. Here’s a step-by-step approach:
- Set up your project: Create a new project in Webflow and set your canvas size.
- Create your base styles: Set up your color swatches, typography styles, and any global styles you’ll use throughout your site.
- Build your layout: Start with the basic structure – header, main content area, and footer. Use Webflow’s flexbox and grid tools to create responsive layouts.
- Add content sections: Build out your various content sections, paying attention to spacing and alignment.
- Style your elements: Apply your color scheme and typography styles to your elements.
- Create components: For elements that will be reused across your site (like buttons or cards), create components to ensure consistency.
- Add interactions and animations: Use Webflow’s interaction tools to add any necessary hover effects, scrolling animations, or other interactive elements.
Leveraging Webflow’s Unique Features
As you recreate your design, take advantage of Webflow’s powerful features that may not have been available in your WordPress setup:
- Flexbox and grid layouts: These tools allow more precise control over your design and make creating responsive layouts much easier.
- Custom animations and interactions: Webflow’s interaction design tools will enable you to create complex animations without writing code.
- Global swatches and styles: These ensure consistency across your site and make site-wide changes much easier.
- Responsive design tools: Webflow’s breakpoint system lets you quickly fine-tune your design for different screen sizes.
Implementing Responsive Design
In today’s mobile-first world, ensuring your site looks great on all devices is crucial. Webflow excels in this area with its responsive design tools. Here’s how to approach responsive design in Webflow:
- Start with mobile: Design your mobile layout first, then progressively enhance it for larger screens.
- Use flexible layouts: Utilize flexbox and grid to create layouts that naturally adapt to different screen sizes.
- Set breakpoints: Use Webflow’s breakpoint system to define how your layout changes at different screen widths.
- Adjust typography: Ensure your text is readable on all devices by adjusting font sizes and line heights for different breakpoints.
- Test thoroughly: Use Webflow’s preview mode to test your design across various device sizes and orientations.
Creating a Style Guide
Create a comprehensive style guide to maintain consistency throughout your new Webflow site. This should define:
- Color palette: Include primary, secondary, and accent colors, along with their hex codes.
- Typography: Specify font families, sizes, and styles for different elements (headings, body text, links, etc.).
- Button styles: Define styles for different types of buttons (primary, secondary, call-to-action).
- Form styles: Establish consistent styles for form elements like input fields and checkboxes.
- Spacing: Define standard margins and padding to maintain consistent spacing throughout your site.
- Icons: If you use icons, specify the icon set and any size or color conventions.
Webflow’s global styles and class system make applying consistent styling across your site easy. By creating a style guide and implementing it using Webflow’s global styles, you’ll streamline the design process and make future updates much easier.
Migrating Content
Transferring content from WordPress to Webflow is often the most time-consuming part of the migration process. It requires careful planning and execution to ensure all your content is accurately moved and formatted correctly in your new Webflow site. Let’s break this process down into manageable steps.
Handling Static Pages
For static pages, the process is relatively straightforward but can be time-consuming for larger sites:
- Create new pages in Webflow that correspond to your WordPress pages.
- Copy the content from each WordPress page and paste it into the corresponding Webflow page.
- Format the content using Webflow’s text editor, applying appropriate styles and layout elements.
- Recreate any special layouts or features that were present on the WordPress page.
- Add any necessary images or other media files.
- Set up proper meta titles, descriptions, and other SEO elements for each page.
While this process is manual, it allows you to review and improve each page as you rebuild it in Webflow.
Migrating Blog Posts and Dynamic Content
For blog posts and other dynamic content, Webflow’s CMS import feature can save a lot of time:
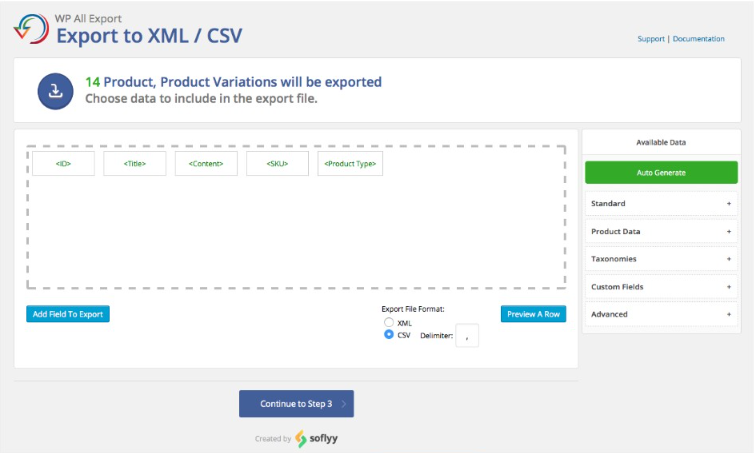
- Export your WordPress content: Use a plugin like “Export any WordPress data to XML/CSV” to export your posts and custom post types to a CSV file.
- Clean your data: Open the CSV file in a spreadsheet program and clean up the data. This might involve removing unnecessary columns, formatting dates correctly, or splitting content into appropriate fields.
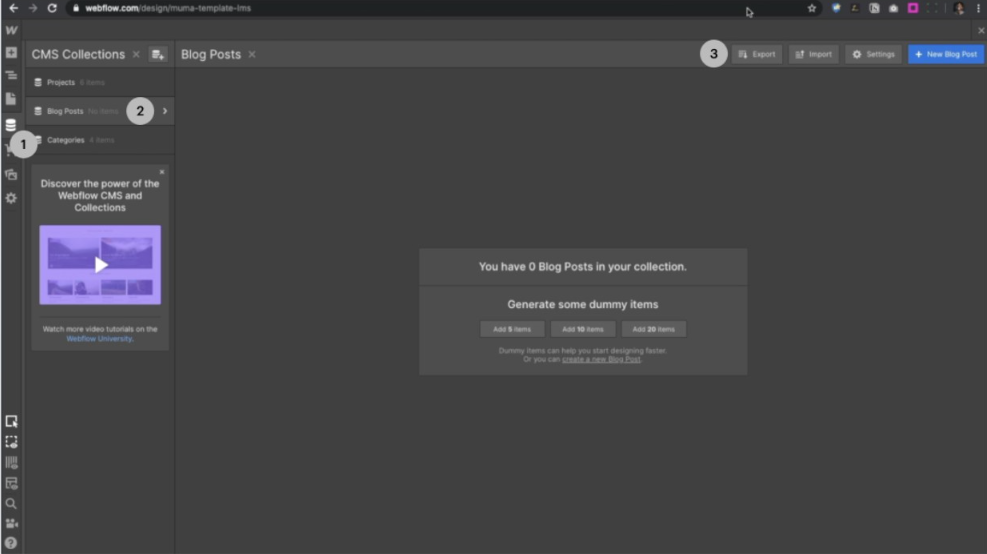
- Set up Webflow collections: Create collections in Webflow that correspond to your WordPress content types. For example, you might have a “Blog Posts” collection.
- Import your data: Use Webflow’s CMS import feature to import your cleaned CSV data into the appropriate collection.
- Map fields: During the import process, you’ll need to map the fields from your CSV to the corresponding fields in your Webflow collection.
- Review and adjust: After import, review your content in Webflow to ensure everything has been imported correctly. You may need to make some manual adjustments.
Handling Media Files aand Assets
Managing media files is a crucial part of the content migration process:
- Download all media files from your WordPress site. You can usually find these in the wp-content/uploads directory.
- Organize these files into a logical folder structure on your local machine.
- Upload these files to Webflow’s asset manager. You can do this in bulk by dragging and dropping folders.
- As you rebuild your pages and posts in Webflow, manually relink these media files to their appropriate locations.
- Optimize images as you go. Webflow has built-in image optimization, but you can further optimize large images to improve load times.
- Update any file URLs in your content to point to the new locations in Webflow.
Remember to pay attention to your file organization in Webflow’s asset manager. A well-organized asset library will make it much easier to manage your site going forward.
Handling Embedded Content and Shortcodes
If your WordPress site uses shortcodes or has embedded content (like YouTube videos or social media posts), you’ll need to handle these separately:
- Identify all instances of shortcodes or embedded content in your WordPress export.
- For each instance, determine how to recreate the functionality in Webflow. This might involve using Webflow’s embedded element or finding alternative solutions.
- Replace the shortcodes or embedded content in your Webflow pages with the appropriate elements or embeds.
- Test each instance to ensure it functions correctly in your new Webflow site.
This process can be time-consuming, but it’s essential for preserving all the functionality of your original WordPress site.
Setting Up Webflow CMS
Webflow’s content management system operates differently from WordPress, so you’ll need to set it up carefully to manage your dynamic content effectively. Here’s a more detailed look at this process:
Creating Collections
Collections in Webflow are similar to custom post types in WordPress. They allow you to structure and organize different types of content. Here’s how to set them up:
- Analyze your WordPress content: Identify the different types of content you have (e.g., blog posts, team members, portfolio items).
- Create corresponding collections: In Webflow, create a new collection for each content type.
- Set up fields: Add fields corresponding to the information you need to store for each collection. This includes title, content, author, publish date, featured image, etc.
- Configure field settings: For each field, set the appropriate field type (e.g., plain text, rich text, image, reference to another collection) and any validation rules.
- Set up custom fields: If you had custom fields in WordPress, recreate these in your Webflow collections.
Importing Content from WordPress
Once your collections are set up, you can import your WordPress content:
- Prepare your WordPress export: Export your content from WordPress in CSV format, ensuring all necessary information is included.
- Clean your data: Review your CSV file and clean up any formatting issues or unnecessary data.
- Use Webflow’s import tool: Navigate to your collection in Webflow and use the import feature to upload your CSV.
- Map fields: Carefully map each column in your CSV to the corresponding field in your Webflow collection.
- Import and review: After mapping, import your data and then review it in Webflow to ensure everything has been imported correctly.
- Make manual adjustments: You may need to adjust formatting or content after the import.
Configuring Dynamic Content Display
After your content is imported, you need to set up how it will display on your site:
- Create template pages: For each collection, create a template page that will determine how individual items are displayed.
- Design your list pages: Create pages that display lists of your collection items (e.g., a blog index page).
- Use collection lists: On your list pages, add collection list elements and connect them to your collections.
- Style your dynamic content: Apply appropriate styles to your template and list pages to ensure your content looks good and is consistent with your overall design.
- Set up pagination and filtering: If necessary, add pagination to your list pages and set up any required filtering or sorting options.
- Create dynamic links: Ensure items in your collection lists link correctly to their individual pages.
- Test thoroughly: Review all your dynamic content to ensure it displays correctly and all links work as expected.
By carefully setting up your Webflow CMS, you can create a content management system tailored to your specific needs and potentially more efficient than your previous WordPress setup.
SEO Considerations
Preserving your site’s SEO value during the migration is crucial. A poorly executed migration can result in a significant drop in search engine rankings. Here are key steps to follow to maintain and potentially improve your SEO during the WordPress to Webflow migration:
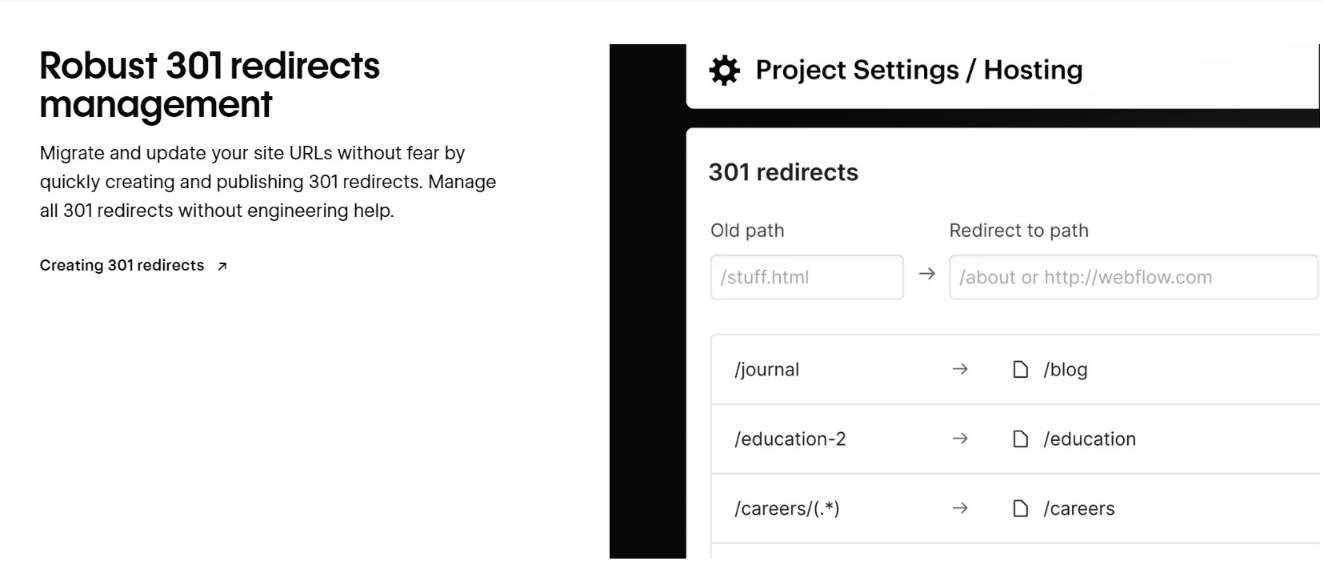
- Create a list of all your current WordPress URLs: Use a tool like Screaming Frog to crawl your WordPress site and generate a complete list of URLs.
- Set up 301 redirects: In Webflow, set up 301 redirects from your old WordPress URLs to their corresponding new pages. This ensures that any existing backlinks or bookmarks will still lead users to the correct content on your new site.
- Optimize meta titles and descriptions: As you recreate your pages in Webflow, pay careful attention to your meta titles and descriptions. Ensure they’re optimized for your target keywords while accurately describing the page content.
- Maintain heading structure: Preserve your heading structure (H1, H2, H3, etc.) as you transfer content. Proper heading structure is important for both SEO and accessibility.
- Incorporate important keywords: Make sure to naturally include your target keywords in your content, headings, and metadata.
- Optimize images: As you upload images to Webflow, add alt text and descriptive file names. This helps search engines understand your visual content.
- Generate sitemaps: Use Webflow’s built-in features to generate XML sitemaps. These help search engines discover and index your content more efficiently.
- Create a robots.txt file: Set up a robots.txt file in Webflow to guide search engine crawlers on how to interact with your site.
- Maintain internal linking: Recreate your internal linking structure in Webflow, ensuring important pages are well-linked within your site.
- Leverage Webflow’s clean code: Take advantage of Webflow’s clean code output, which can contribute to improved page load times – a positive factor for SEO.
- Set up HTTPS: Ensure your new Webflow site uses HTTPS, as this is a ranking factor for search engines.
- Update external links: If you have control over any external sites linking to your content, update these links to point to your new Webflow URLs.
Testing and Launching
Before launching your new Webflow site, thorough testing is essential to ensure a smooth transition. Here’s a detailed look at the testing and launch process:
Quality Assurance and Cross-Browser Testing
- Visual inspection: Go through each page of your site and compare it to your original WordPress site. Look for any design discrepancies or formatting issues.
- Functionality testing: Test all interactive elements like forms, sliders, and buttons to ensure they work as expected.
- Cross-browser testing: Check your site in different browsers (Chrome, Firefox, Safari, Edge) to ensure consistency.
- Device testing: Test your site on various devices (desktop, tablet, smartphone) to verify responsive design implementation.
- Link Checking: Use a tool like Broken Link Checker to identify and fix any broken internal or external links.
- Form testing: Submit test entries for all forms on your site to ensure they work correctly and send data to the right place.
- Search functionality: If you have a search feature, test it with various queries to make sure it returns accurate results.
Performance Optimization
Optimizing your new Webflow site’s performance is crucial for user experience and search engine rankings. Start by conducting page speed tests using tools like Google PageSpeed Insights or GTmetrix to identify performance bottlenecks. Pay special attention to image optimization, ensuring all visuals are appropriately sized and compressed for web use without sacrificing quality.
Use Webflow’s built-in settings to minify your HTML, CSS, and JavaScript, reducing file sizes and improving load times. Implement browser caching to store static assets locally on users’ devices, significantly speeding up load times for returning visitors.
Finally, consider leveraging Webflow’s Content Delivery Network (CDN) to distribute your site’s content across multiple servers worldwide, dramatically improving load times for users regardless of their geographic location. These optimizations will collectively contribute to a faster, more efficient website that provides a superior user experience and performs better in search engine rankings.
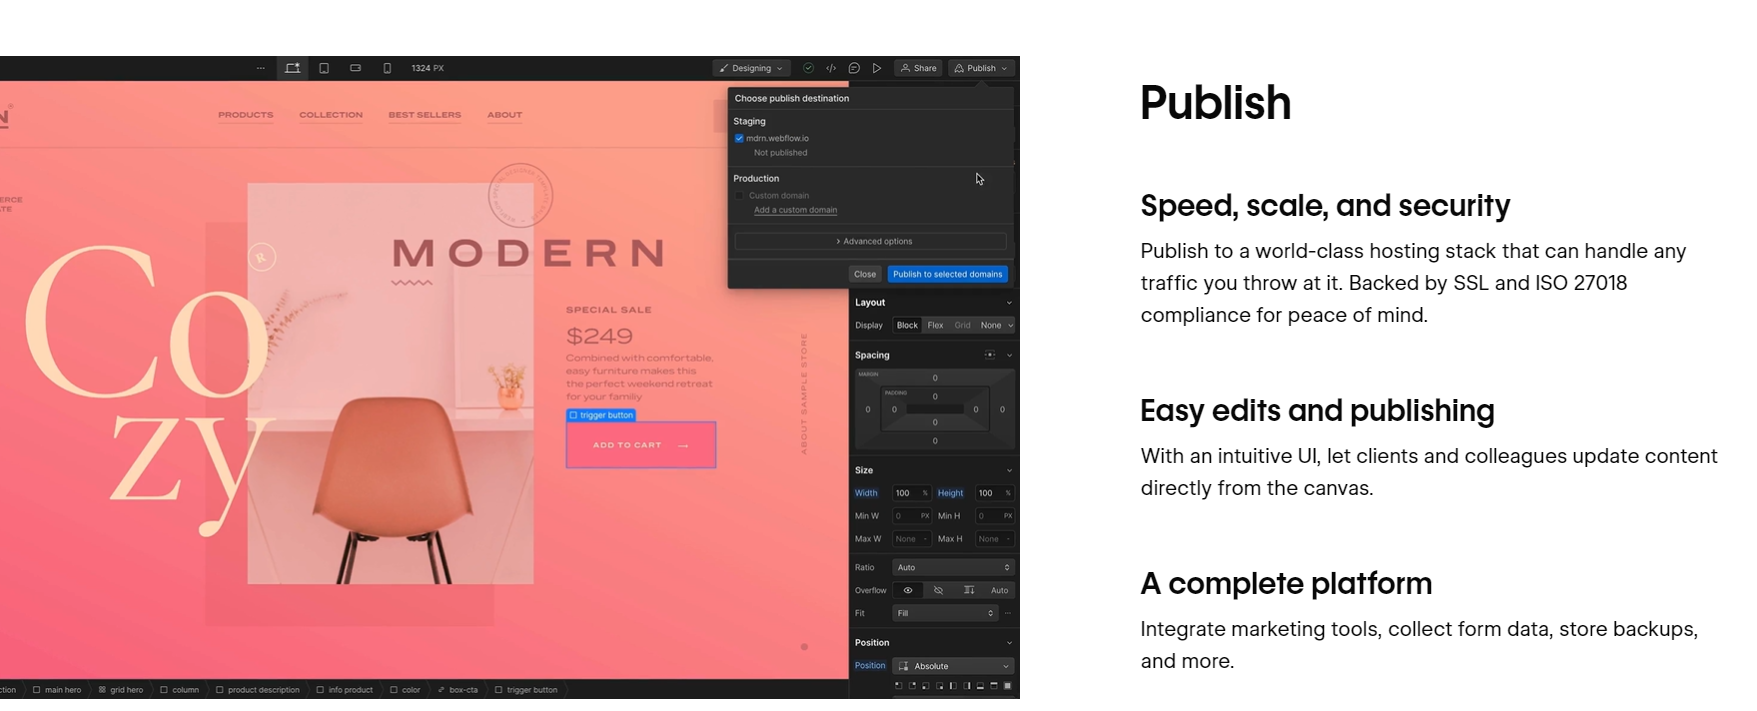
Going Live with Your New Webflow Site
As you prepare to launch your new Webflow site, it’s crucial to follow a careful process to ensure a smooth transition. Begin by creating a final backup of your WordPress site, safeguarding your data before making any changes. Next, update your domain’s DNS settings to point to your new Webflow site, understanding that a brief period of downtime may occur as these changes propagate. Ensure your SSL certificate is properly installed and functioning to maintain secure connections. Once everything is set, publish your Webflow site to your custom domain.
After publishing:
- Conduct a thorough redirect check to verify that all 301 redirects work correctly, preserving your SEO value.
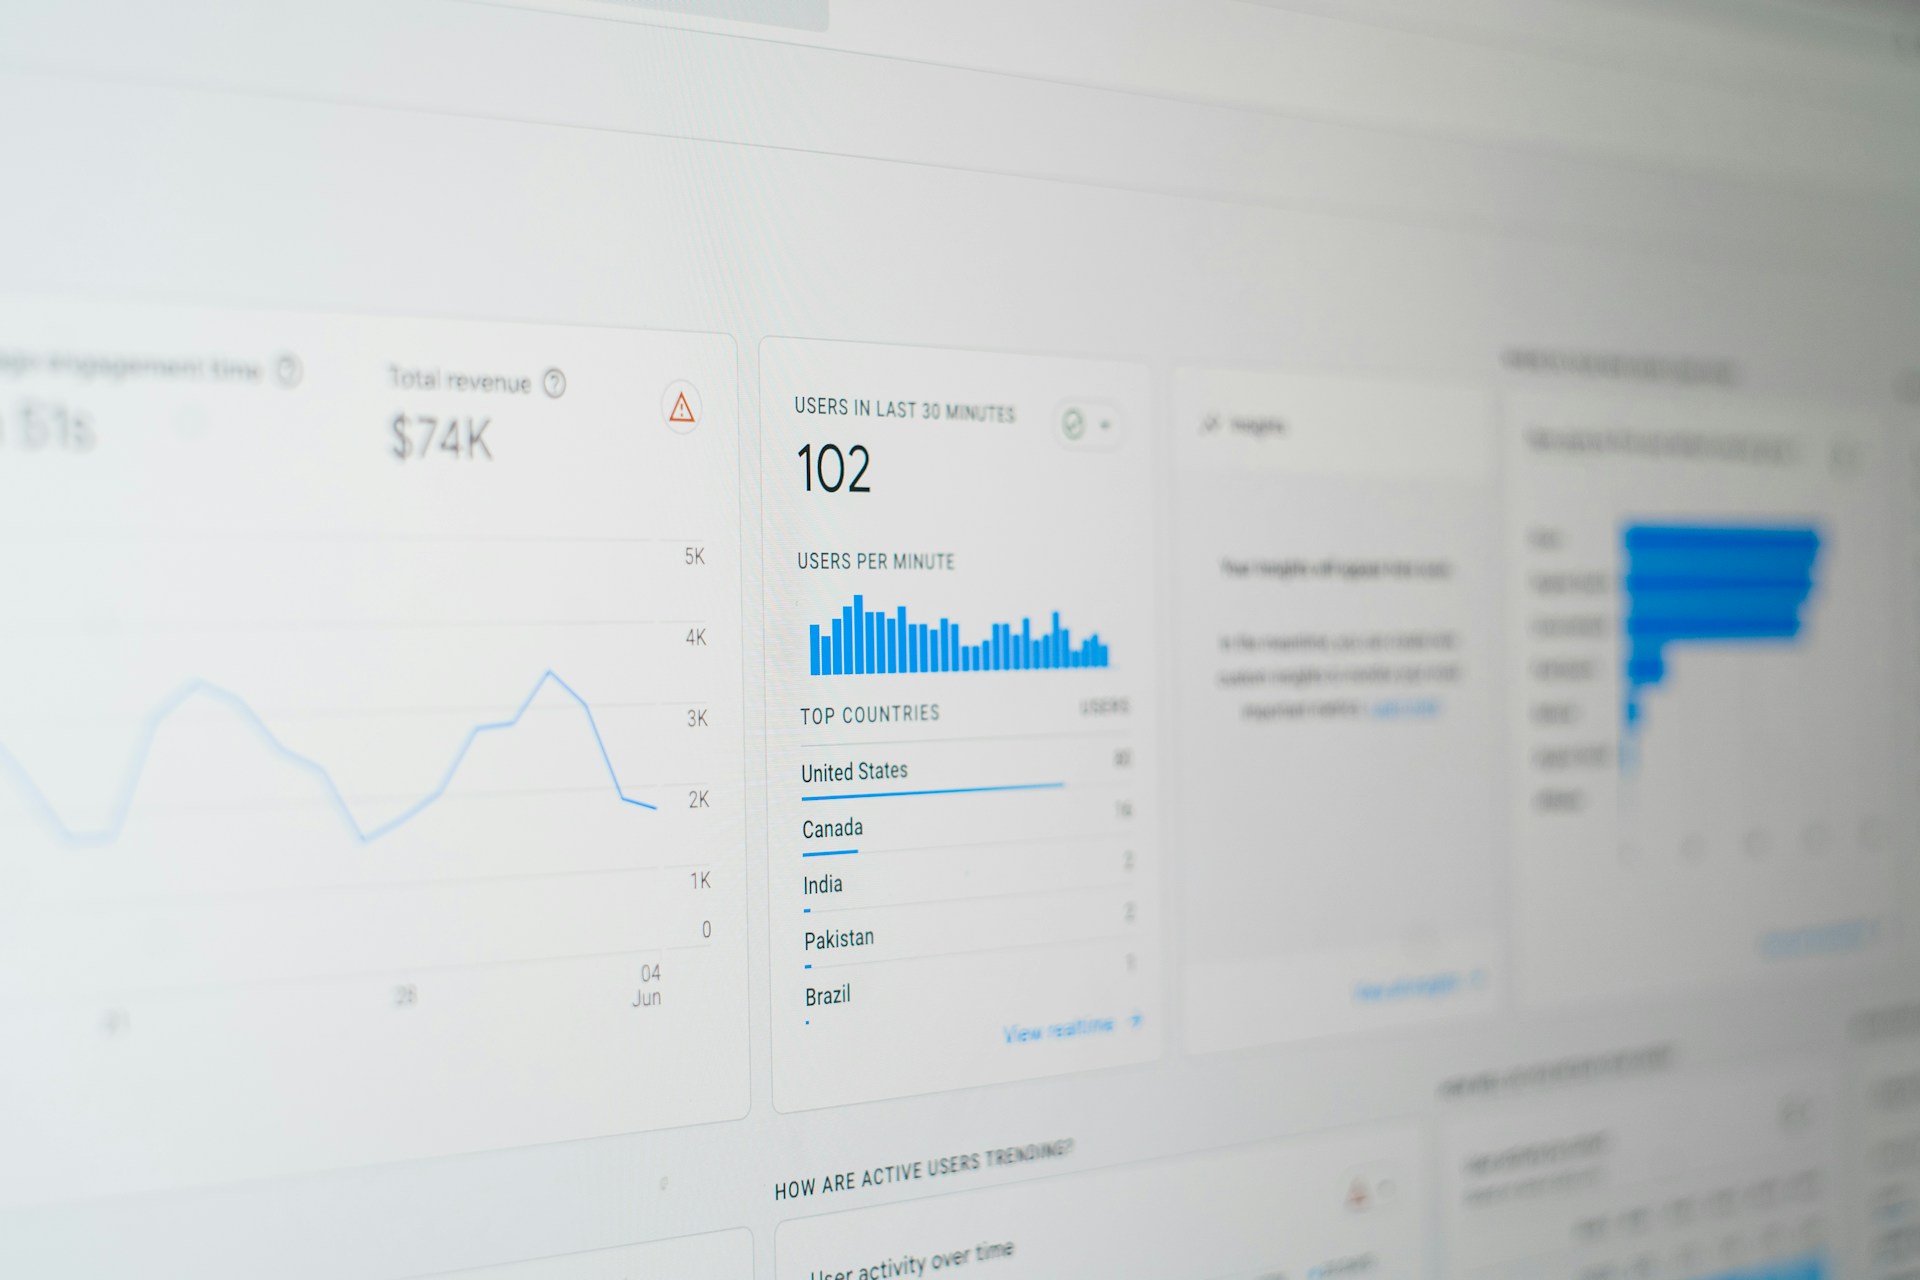
- Don’t forget to set up your analytics tools, such as Google Analytics, on the new site to continue tracking user behavior.
- Update your Google Search Console property and submit your new sitemap, helping search engines index your new site structure efficiently.
Post-Launch Monitoring
Once your site is live, closely monitor it for any issues:
- Traffic monitoring: Keep a close eye on your analytics to ensure traffic is being correctly directed to your new site.
- Search rankings: Monitor your search rankings for important keywords to catch any significant changes.
- User feedback: Be prepared to address any user-reported issues or confusion quickly.
- Performance monitoring: Continue to monitor your site’s performance and make optimizations as needed.
Post-Migration Tasks
After launching your new Webflow site, your work isn’t quite finished. Here are some important post-migration tasks to ensure long-term success:
Monitoring and Fixing Issues
Maintaining your newly migrated Webflow site requires ongoing attention and proactive management. Start by implementing a rigorous auditing schedule: conduct weekly site audits for the first-month post-migration, then transition to monthly checks thereafter. During these audits, meticulously scan for broken links, 404 errors, and any other issues that may have surfaced.
Simultaneously, make it a priority to regularly assess your site’s loading speed, implementing optimizations as necessary to ensure peak performance. Keep a vigilant eye on your Google Search Console, monitoring for any indexing issues or manual actions that could affect your site’s search visibility.
Lastly, make it a habit to review your site analytics regularly. This practice will help you confirm that traffic patterns align with your expectations and allow you to swiftly identify and address any potential issues that may arise. By adhering to this comprehensive post-migration maintenance routine, you’ll be well-positioned to preserve and enhance the performance and user experience of your new Webflow site.
Do You Need Help? We Got You!
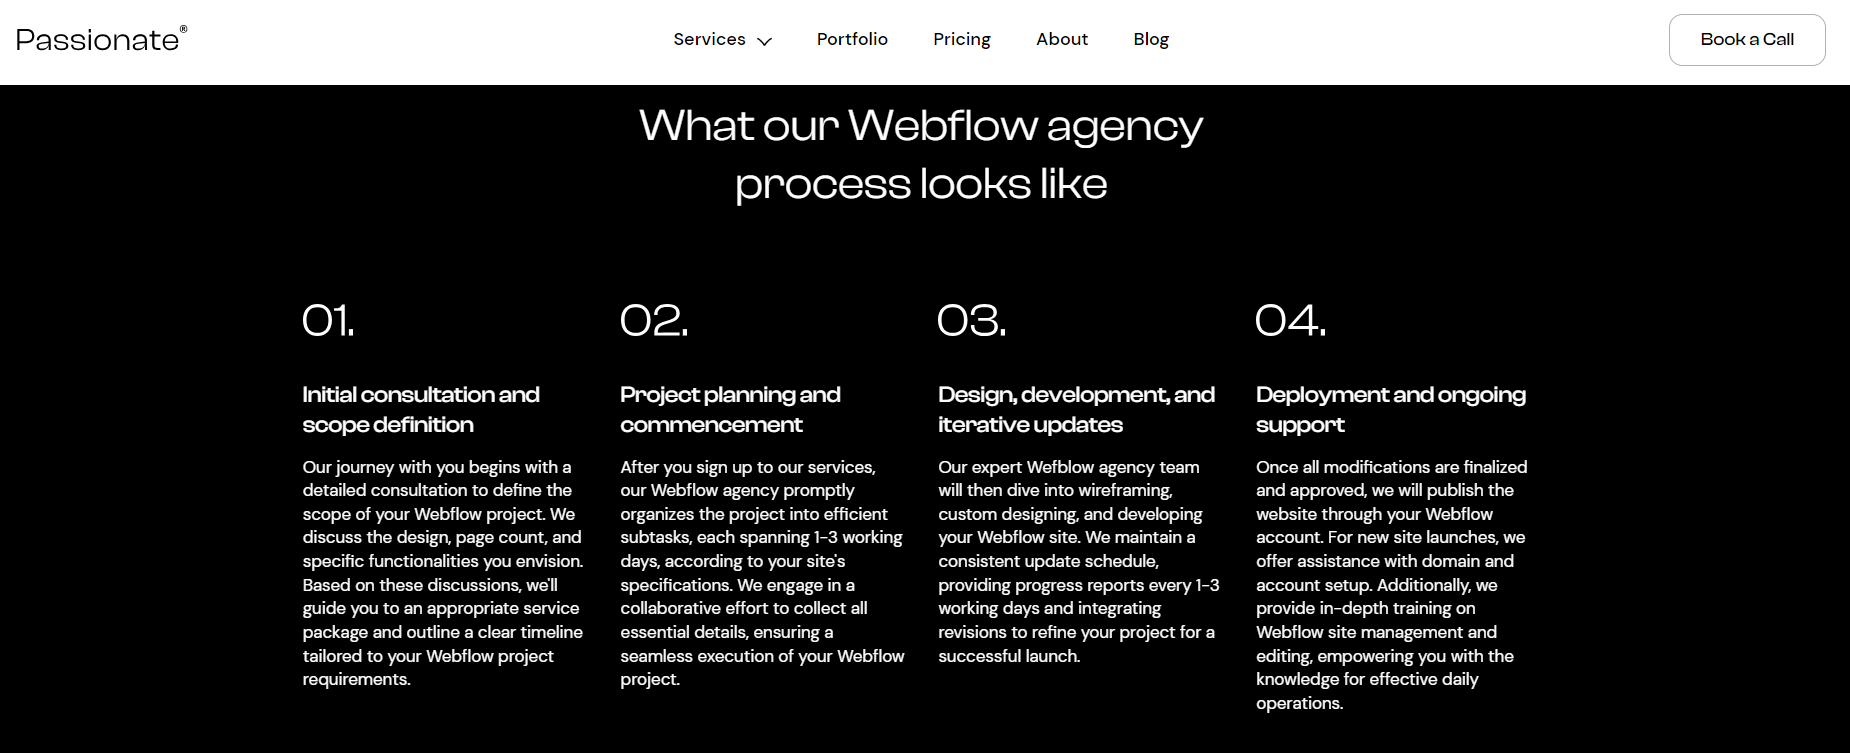
At Passionate Design Agency, we specialize in seamlessly transitioning your website from WordPress to Webflow, ensuring that your online presence remains intact and is enhanced in the process. We offer:
- Seamless Transition: Expertise in migrating your website from WordPress to Webflow while enhancing your online presence.
- Skilled Team: A dedicated group of designers and developers focused on preserving your brand identity.
- Dynamic Design: Utilization of Webflow’s powerful features to create a more visually appealing website.
- Content Migration: A meticulous approach to ensure accurate transfer of all valuable content, including:
- Blog posts
- Images
- Custom post types
- SEO Considerations: Attention to preserving your search engine rankings during the transition, safeguarding your hard-earned visibility.
We also offer a unique approach that combines the best of in-house designers and developers and traditional agencies. Here’s what makes us stand out:
- Wide range of services: We cover all your web design and development needs in one place.
- Top-quality work: We only work with the best designers and developers in the industry.
- Affordable pricing: Our costs are similar to hiring a mid-level designer and developer but without extra expenses.
- Fast results: Most projects are completed within 1-3 days.
- Easy to work with: We quickly adapt to your existing processes.
- Flexible options: You can easily adjust our services based on your needs.
Our Three Simple Pricing Packages
- Sprint Package: $2,999 for 2 weeks of unlimited requests, one at a time.
- Standard Package: $4,999 per month for unlimited requests, one at a time.
- Enterprise Package: $9,999 per month for unlimited requests, two at a time.
By choosing Passionate Design Agency for your WordPress to Webflow migration, you’re not just getting a technical service – you’re partnering with a team that’s passionate about elevating your online presence. We work closely with you to understand your goals and tailor the migration process to meet your specific needs.
Ready to take your website to the next level with Webflow? Contact Passionate Design Agency today for a free consultation and discover how we can transform your online presence.
Summary
Migrating from WordPress to Webflow can be a transformative process for your website, offering improved design flexibility, performance, and ease of maintenance. While the migration process requires careful planning and execution, the benefits of making the switch can be substantial.
By following the steps outlined in this guide, you can successfully transition your site from WordPress to Webflow, taking advantage of the platform’s powerful features to create a faster, more secure, and visually stunning website. Remember that the key to a successful migration lies in thorough preparation, attention to detail, and a willingness to embrace the new possibilities that Webflow offers.
Whether you’re a small business owner looking to refresh your online presence or a web designer seeking more creative freedom, the WordPress to Webflow migration can open up new horizons for your digital projects. Embrace the change, and watch your website transform into a more dynamic and efficient online platform.
Frequently Asked Questions
What are the main advantages of migrating from WordPress to Webflow?
Migrating from WordPress to Webflow offers several benefits, including greater design freedom, improved performance, enhanced security, and easier maintenance. Webflow’s visual design interface allows unprecedented control over your website’s look and feel without requiring extensive coding knowledge. It also generates clean, efficient code, resulting in faster page load times and improved SEO. Additionally, Webflow’s closed system has fewer potential entry points for security breaches and handles all system updates automatically, simplifying the maintenance process.
How can I prepare for the WordPress to Webflow migration?
To prepare for the migration, start by creating a complete backup of your WordPress website, including the database and all files. Next, benchmark your current website’s performance and functionality using tools like Google PageSpeed Insights and Google Analytics. Perform a thorough content audit, noting the number of pages, posts, media files, and any custom fields or metadata. Finally, set up your Webflow account and choose an appropriate hosting plan that suits your needs.
What are the options for migrating content from WordPress to Webflow?
There are two main methods for migrating content: automatic and manual. Automatic migration tools like PowerImporter and Flow Ninja can simplify the process, especially for larger sites with extensive content. These tools can quickly transfer most of your content but may not handle complex layouts or custom functionality perfectly. The manual migration method involves exporting your WordPress content, setting up corresponding collections in Webflow’s CMS, and importing the content manually. This method offers more control but requires more time and effort.
How can I ensure my SEO is preserved during the migration?
To maintain your site’s SEO during migration, focus on preserving URLs and setting up proper redirects. Match your Webflow URL structure to your WordPress permalinks and create a redirect map to ensure all important pages are properly redirected. Transfer meta titles and descriptions from WordPress to Webflow’s SEO settings for each page and collection item. Also, make sure all images have appropriate alt text in Webflow. After migration, update Google Search Console with your new Webflow site and submit your new sitemap to search engines.
What are some common challenges in WordPress to Webflow migration?
Common challenges include potential content loss, especially for complex or custom content types; design inconsistencies that may require manual adjustments; functionality gaps where WordPress plugins or features may not have direct equivalents in Webflow; SEO impact if URL structures and metadata are not handled correctly; and performance issues if content or design elements are not properly optimized. Additionally, there may be a learning curve for teams unfamiliar with Webflow’s interface and capabilities.